


Your Prenly Onboarding
-
Google | Create a Google Account
Created 4 Aug 2026
A Google Account is required to access services such as the Google Play Console. Be aware: Create a Google Account, not a Google Workspace account. A Google Workspace account requires a paid subscription. Tip: We recommend using a shared or general email address (for example apps@company.com) that multiple people in your organization can access. This ensures you retain access in case of vacations, illness, or personnel changes. Option 1: Create a Google Account during Play Console registration If you are setting up a Google Play Console account, you can create your Google Account as part of the registration process: click here to get started. Option 2: Create a Google Account directly You can also create your Google Account first by visiting this link. Then follow these steps: Step 1: Click Create account. Step 2: Select For my personal use. Selecting For work results in creating a Google Workspace account. Step 3: Enter the account holder’s first name and, optionally, last name.Note: Google may later require identity verification using a valid government-issued ID. The account should therefore represent a real individual. Enter your date of birth. Adding your gender is optional. Choose one of the following: Use your existing email address by selecting Use your existing email, or Create a new Gmail address by following the prompts. Step 4: Verify your email address (if using an existing email). Google will send a verification code that must be entered to continue. Step 5:Create a secure password.Enable two-factor authentication (2FA) to improve the security of the account. This is strongly recommended and required for many Google services. Next steps Once your Google Account has been created, you can use it to sign in to Google services such as the Google Play Console. For more information, refer to Google’s official documentation:https://support.google.com/accounts/answer/27441
-
ID token
Created 30 Mar 2026
An ID token can be used to extract the unique user ID after the user has successfully authorised. You can also opt-in to bypass the use of a resource server by using a custom claim in the ID token payload.Specifications To use an ID token, you must verify that: The ID token follows the JWT specification (RFC 7519). The ID token follows the OpenID Connect Core specification. The ID token contains the required claims (see OpenID specification for details). The ID token validation complies with the specification. Issuer and Discovery Prenly requires knowledge of the issuer ("iss" in the ID token payload), where the issuer must be a valid URI. You may also require to meet the Discovery specification. In particular: OpenID Providers supporting Discovery MUST make a JSON document available at the path formed by concatenating the string /.well-known/openid-configuration to the Issuer. – section Obtaining OpenID Provider Configuration Information This path is formed by concatenating the issuer: {issuer}/.well-known/openid-configuration Notes: The issuer must not include a trailing slash. The issuer must be a valid, functional URL. Validation The ID token must be verifiable before its payload can be trusted. Prenly requires access to the JSON Web Key Set (JWKS), typically referenced as: JKU JWKS URI This is commonly available via: {issuer}/.well-known/jwks (or specified in the OpenID configuration) Additional requirements: If multiple signing keys are used, the "kid" header claim must be included in the ID token. If only one key is used, Prenly assumes that key is valid for verification. You can test and verify ID tokens using tools such as: https://jwt.io Testing via JWT.io Go to https://jwt.io Paste your ID token into the Encoded field Review decoded sections: Header Payload Signature If verification fails: Paste your JWK (JSON) into the field: "Public Key in SPKI, PKCS #1, X.509 Certificate, or JWK string format" Payload In addition to required claims, Prenly primarily uses: "sub" Optional supported claims: "email" "given_name" "family_name" "name" for a full list of claims see the specification for required and optional claims. If name and email are available: They will be displayed in the UI after login Otherwise: A placeholder will be shown Custom Claims (Subscriptions) Prenly supports custom claims in the ID token: Must be a string array Each value represents a subscription product code Used to grant access to protected content Scopes Required scope: openid Recommended scope: offline_access (for details see specification for offline access) Benefits: Allows longer-lived authentication sessions Important behavior: Prenly uses the access token to determine authentication status Session duration depends on: Token expiry Prenly cache duration (minimum: 20 minutes)
-
Redirect URIs and Error redirect URIs
Created 30 Mar 2026
Prenly does not currently use URIs for redirection. The following redirect URIs can be configured in your authorization server to prevent attack-in-the-middle attacks. Prenly will use query parameters defined by the authorization flow, but the redirect URI should be configured in the authorization server without them. If you need more information, you can contact Prenly customer service at hello@prenly.com.Logging in Prenly supports the OAuth2 authorization flow with the grant authorization code. Prenly will use the following redirect URIs upon successful login. Android: {package-name}://auth/oauth2-authorization-code/login-with-code iOS: {package ID}://auth/oauth2-authorization-code/login-with-code Web: {web app URL}/authorization/auth-codeFor example https://your.epaper.url/authorization/auth-code Note. Android will strip "_" from the {package-name}. Log out Prenly will use the following redirect URIs upon successful logout, where logout is an authorization request to end the current user session on the authorization server. Android: {bundle-name}://auth/oauth2-authorization-code/logout iOS: {bundle ID}://auth/oauth2-authorization-code/logout Web: {web app URL}/authorization/auth-code
-
Uploading archive
Created 12 Feb 2026
Using an FTP client, an archive (of standard PDF files) can be uploaded to us. Here are some simple instructions. Note: If your archive is larger than 100 GB, please contact us before uploading. Naming the files All uploaded PDF files must be named with the title (name or abbreviation of the newspaper) and publication date, if necessary also the part to which the PDF file belongs and the page number. If an issue consists of a merged PDF:title_20190101.pdf If an issue consists of several PDF files, add the page number:title_20190101_001.pdftitle_20190101_002.pdftitle_20190101_003.pdf If a number consists of different parts:title_20190101_partA_001.pdftitle_20190101_partA_002.pdftitle_20190101_partA_003.pdftitle_20190101_partB_001.pdftitle_20190101_partB_002.pdftitle_20190101_partB_003.pdf It is important to be consistent The name structure provided allows the files to be imported. Characters such as underscores and periods are also important. If any of the characters are replaced, the files will not be found during import and therefore not published. Therefore, make sure that the name structure always looks the same. Naming issues using the issue number (optional) By default, an issue will be named after the publication date, for example 2019-01-01.It is also possible to name the issue using its issue number, provided that the number is included in the filename in a structured format.For this to work, each PDF must follow a consistent naming format, for example:title_1_20190101.pdftitle_2_20190201.pdf In this example, we can extract issue numbers 1 and 2 from the filename, as well as the year 2019. If you would like to use this feature, please inform us:- that the issue number should be used in the name- which position in the filename contains the issue number- how the name should be formatted Examples of display format:- No. 1 - 2019- Issue 1 2019
-
LOGIN | CSV
Created 12 Feb 2026
A common way to lock material behind a login procedure is to use a CSV file. When a reader tries to log in, a check is made against the registry (CSV file) which determines whether access is granted or not. What should the registry contain? A CSV file looks like an Excel file and the desirable information it should contain is:- Names- Email addresses- Customer number/subscription number/ID number Where should the register be saved? The file gets uploaded to us by using an FTP-client. The file gets uploaded to us by using an FTP-client.If you do not have an FTP client, you will need to download one, such as FileZilla.- Download FileZilla for Mac- Download FileZilla for Windows Remember to always name the file the same way every time a new file is created, so that we can always find it when we import.
-
Generate a Privacy Policy
Created 27 Nov 2025
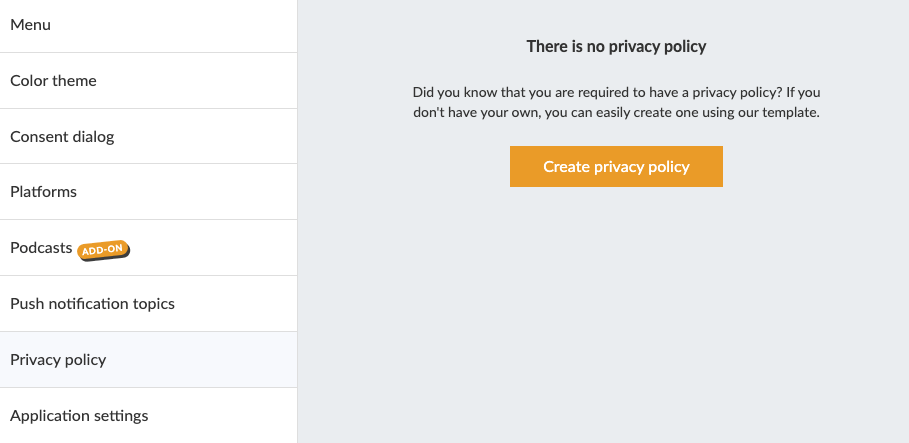
If you do not have an existing Privacy Policy, you can create and host your Privacy Policy page directly in Prenly. In Prenly Workspace in the left-hand menu, click Applications and select your application where you want to add the Privacy Policy. In the application menu, click Privacy Policy. Here you can get started on creating your privacy policy. Next you can either paste in existing content, or, if you do not have an existing Privacy Policy, you can use our tool to generate a new Privacy Policy: https://privacy.prenly.co/ In the top-right corner, select the language selector to switch to your preferred language. This is important to remember: You are always the Data Controller who has the responsibility to ensure that the policy is correct for your company. Please note that the page currently doesn't store things, so reloading the web page will empty the form.
-
Google | Validate Account
Created 24 Oct 2025
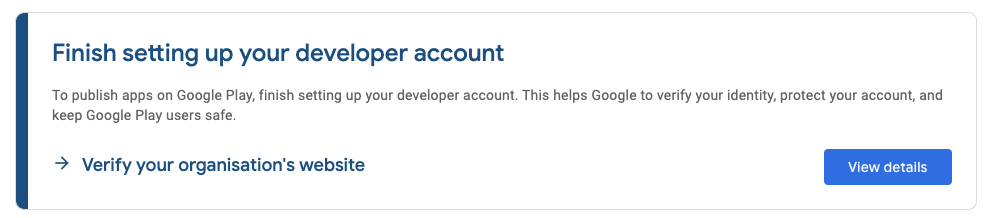
In Google Play Console you will see this banner: Picture showing banner in Google Developer account. Click on “View details” and you will see the following view: Picture showing instructions to very the organization's website. Click on “Go to Search Console”.In Google Search Console under Domain fill in your company domain (e.g. prenly.com). Picture showing the Google Search Console. You will see something like this: Picture showing instructions for domain ownership via DNS record. ... Google wants you to prove that you own the mentioned domain by adding a special code to your domain’s settings (this is called a DNS TXT record). Here’s how to do it: Log in to Your Domain Registrar • Go to the website where you purchased or manage your domain (e.g., GoDaddy, Namecheap, Cloudflare, or a similar service).• Log in using your account credentials. Go to Your DNS Settings • Once logged in, find the DNS settings or Zone Editor for your domain.• It’s often located in a section called Manage Domains or DNS Management.• Look for something like “Edit DNS Records” or “Zone File Settings”. Add the TXT Record • Record Type: Select TXT (as shown in the screenshot, this is the record type Google is asking for).• Host/Name: Some registrars require you to enter @ (this represents the root domain). Others might ask you to leave it blank or enter your full domain name.• Value/Text: Copy the exact TXT value from the screenshot: google-site-verification=xyz and paste this into the Value or Text field. Save the Record • Once you’ve entered the details, click Save or Update.• The TXT record is now added to your domain’s DNS settings. ... Verify in Google Search Console • Go back to Google Search Console.• Click the Verify button at the bottom of the screen.• Tip: If on Google Search Console you see graphs and data, that indicates that the txt record has been successful. Verify in Google Play Console • In Google Play in the banner showing “Finish setting up your developer account” click on “view details” • Click on “verify website”• If this leads you to your account details, scroll down to your organisation's website and click on the button “...” • Check if the banner on the Google Play Console startpage disappeared ... Important Notes• DNS changes may take some time (up to 48 hours) to update across the internet. If verification doesn’t work immediately, wait a few hours and try again.• If you don’t know where your domain is registered or managed, contact the person or team responsible for setting up your website.•
-
Privacy Policy
Created 24 Oct 2025
According to Swedish data protection legislation and the GDPR (General Data Protection Regulation), you, as the data controller, are required to provide a valid privacy policy. If you also have an Android or iOS app, you are required to provide a valid privacy policy in accordance with Google's and Apple's guidelines. If you do not have your privacy policy, you can refer to Generate a Privacy Policy. It's important to keep in mind that your privacy policy must clearly outline how you, as the data controller, collect, use, and potentially share user data. You are not allowed to process user data that is not specified in your privacy policy. User Data Personal and sensitive user data includes any information that can be directly or indirectly linked to a specific (natural) person. Personal identity number Contact information, such as email address and phone number Payment information or other financial details Authentication details (i.e. login credentials) Authorization details (i.e. subscription information) Health-related information, including sexual orientation In other words, any information that can identify a specific user from among all available users when using the service/product. Google's requirements Your privacy policy must... ...describe what data the app can access or collect about the user. ...explain how the data [1] is used and/or shared. ...not be combined with other disclosures that are unrelated to the collection of personal and/or sensitive user data. ...the term "Privacy Policy" must appear somewhere in the text. Google will translate the information into English, and if their translation tool cannot find the phrase "Privacy Policy," the policy will be rejected. ...be directly accessible via a URL (web address) without a paywall, and the page must not be editable. A linked PDF is not allowed. ...cannot be partial. The full policy must be accessible via the URL and cannot link to external resources such as "read more". Sources https://support.google.com/googleplay/android-developer/answer/10144311?hl=en&sjid=13395122270323995155-EU Frequently Asked Questions Do I need a privacy policy? Yes, if you have an e-paper, you are required to have a privacy policy. Can I place my privacy policy behind a login? No. The privacy policy must be publicly accessible in full via a website. It may not be provided as a downloadable document, such as a PDF or MS Word file. Can I include my privacy policy in my e-magazine? Yes, that's possible. You can include it as an article in an open digital publication via Prenly Workspace, and the article can serve as a webpage for your privacy policy.
-
Google | Create an Android Developer Account
Created 24 Oct 2025
To publish an Android app on Google Play, you need a Google Play Console developer account. Before creating the account, you will need a Google Account and a D-U-N-S number. Step 1 - Google Account The Play Console developer account is permanently linked to the Google Account used during registration. Choose carefully, as the account owner cannot be changed later. If you do not yet have a Google Account, follow this guide before continuing. Step 2 - DUNS number If you have already received the D-U-N-S number, go directly to step 3. In order to create a developer account with Google, you need a D-U-N-S number. The D-U-N-S can be described as an international organization number. If you do not know your organisation's DUNS number, visit dunsnumberlookup.dnb.com to have it sent to you. Step 3 - Play Console developer account Make sure you are on the correct account, or select Switch accounts to select the correct account owner. Start the process of creating your new developer account here. Sign in with the correct Google Account. If necessary, select Switch accounts. Accept Google's distribution agreement. Google will charge a one-time fee of $25. Google will accept multiple payment options, select the one most suitable for you and pay the registration fee. Be aware: Select Organisation as the account type. This setting cannot be changed after the account has been created. Tip: The developer name you choose will be displayed publicly on Google Play. We recommend using your organization’s official name. Step 4 - Invite Prenly Log in to your Play Console account Click on "Users and permissions" in the left-hand menu Select "Invite new users" Enter dev@prenly.com as the user email and leave the Expiry date empty. In the Permissions section, select Account permissions, select Admin Select Invite user to invite Prenly Tip: If the "Invite user" button is grey, it means you have missed a step. Step 5 - Complete the account verification Important: Before your Play Console developer account can be used, Google requires several verification steps. Make sure all of the following have been completed: Verify your organization by providing your D-U-N-S number. Verify the identity of the account owner using a valid government-issued ID. Verify your organization’s website. Your developer account will not be fully activated until all required verification steps have been completed. Recommendation Once you have created your Play Console developer account, we recommend saving or printing the payment confirmation email from Google. The email contains important information that may be required if you ever need to transfer your app to another Play Console account, including: The transaction ID The payment method used The purchase date The account owner’s email address
-
Apple | Create Developer Account
Created 24 Oct 2025
In order to publish an iOS app on the App Store, you need a company developer account, which requires a DUNS number and an Apple Account. If you do not have this already, it is created via Apple. If you need more detailed instructions than the guide below, click here and scroll down to Enrolling in the Apple Developer Program as an organization. Start here: Step 1 - Apple Account (Previously referred to as Apple ID) Apple Account is created here: Apple Account Tip! Enter a general email address that several people in your company have access to. In case of illness, vacation, change of position. Step 2 - D-U-N-S number If you have already received the D-U-N-S number, go directly to step 3. In order to create a developer account with Apple, you need a D-U-N-S number. The D-U-N-S can be described as an international organization number. Go to this link to check/create one. You can also use this page, to have your D-U-N-S number sent to you. Step 3 - Developer account Click on the link and follow the instructions to create an account. Be sure to enter Company/Organization as the entity type later in the flow. After the application has been submitted, Apple will send further instructions via email within a few days. Step 4 - Invite Prenly to the developer account, after Apple has approved the application made in Step 3. ▪ Log in Under "Program resources" and "App Store Connect" select "Users and Access". A table view with users appears here. In the menu, click on the plus sign to add a new user. Add Prenly's developer account as "Admin". The name can be set to whatever you want but the email address must be ios-app-manager@textalkmedia.se Make sure the options under Developer/Additional Resources are checked. Save by clicking on Invite. Under "Users and Access" click on "Integration" and select "Request Access". ▪ Read through the request, check the confirmation box and click "Send". Step 5 - Verify Trader details As of April 2024, all accounts must verify their trader information in order to publish apps. Read more and follow the instructions here.
-
Remote API
Created 24 Oct 2025
The purpose of this document is to explain: 1. ...how the Prenly ecosystem allows user authentication and authorization to be handled by a technical infrastructure owned by the publisher or a third party. 2. ...how a technical implementation can be done by building a modest REST API that follows the “Prenly Remote authority API” specification. Contact Please contact us by e-mail at hello@prenly.com or by phone at +46-31-3884740 for questions or issues regarding this API. Definitions Authentication is the process of verifying someone’s, or something’s, identity, as in whether they are who they say they are, before granting access to protected data. Normally, this is done by providing some credentials such as a username and a password. Given that the credentials match a stored record, the user is “verified” (authenticated) by applying the principle that the user knew something only the “real” user would know. Authorization is the process of deciding what resources a user has access to, i.e. what data the user has permission to access as in what the user may or may not do. For Prenly, this is determining what publications the user can see and open to read. An API (Application Program Interface) is a set of routines, protocols and tools to handle the interaction between different systems or parts of systems, dictating system-to-system communication. In Prenly, an authority is a technical implementation deciding how authentication and authorization are handled by a Prenly application within Prenly’s backend. Introduction The Prenly Remote authority API introduces the ability to replace Prenly’s authorization and/or authentication handling by implementing API endpoints that follow an API specification, which enables a Prenly customer to authenticate and authorize according to their system, requirements and needs. At the core, this enables the Prenly application’s authority to authorize and/or authenticate users as they engage with the Prenly application, i.e. when they read publications within an app, by proxy of the Prenly Remote authority API. The Prenly authority will mediate authentication and authorization requests between users and Prenly where no direct communication is allowed between users and the API implementation. Instead, the API implementation informs the Prenly authority how to act upon the users’ authentication and authorization requests. Implement your API Understand how the user consumes the Prenly application Prenly applications Prenly serves the end user with applications mainly used for reading publications and articles. The application is either a native mobile app on the Android or iOS platform, or our responsive web-based e-reader. These two application types offer a similar user experience. The application may contain published publications that are public for everyone, as well as protected content that needs some kind of permission to be consumed. For native apps, it is also possible to allow any non-logged-in user to consume some publications for free before login is required. Navigating the application By using the application, a user can normally see the start page containing components displaying published publications. Public publications can be opened and read by selecting the publication. But when the user tries to open a protected publication, the application will require the user to log in (authentication). After logging in, Prenly will decide whether the requested publication is readable for that user (authorization). If so, the publication will be opened, ready to be consumed. If the user does not have read access, the user will be notified within the app. The protected content will not be shown, but the user will still be logged in. In some cases, an application will require the user to log in to display certain publications, especially when not all published publications can be seen by just anyone. For example, publications accessible via a subscription where other non-subscribed published publications should be hidden. Setup an API environment Trusting Prenly requests Prenly sends a pre-defined secret key in all authentication and authorization requests. The key is known only by Prenly and your system. You should check that the provided key matches the expected key for all API requests. You may also open up your API endpoints for certain IP addresses only for extra security. Please contact us for an up-to-date list of IPs Prenly will use in requests if you would like this extra security. Encrypt the traffic We strongly recommend disallowing any unencrypted HTTP traffic to your API. Use HTTPS! Allow for a RESTish behaviour < p> Currently, requests are made with HTTP POST, but the API should not be limited to using any HTTP methods for future endpoint expansion. Please see the current API specification for more details, as the API specification has the final say in any discrepancies with this documentation. In API responses, HTTP status codes are used to inform Prenly about the result. You must be able to respond with different HTTP status codes, for successful requests as well as for data errors, runtime errors and unexpected server errors. Request parameters are currently passed as JSON in the request body. All endpoints are currently responding with JSON in the response body. Get acquainted with OpenAPI 3.0 The API specification is documented in a yaml file according to the OpenAPI 3.0 standard (formerly Swagger), stating the technical aspects and requirements of the API and each endpoint, including all request and response data objects. Auto-generated documentation is provided at https://apidoc.prenly.com/remote-api/ and the specification file is available at https://apidoc.prenly.com/remote-api/spec/v1.3-specification.yaml. Feel free to make a copy of the specification file and modify it to your API endpoints (URLs) as the auto-generated specification contains generic named endpoints as a reference. With this file, you can easily build a testing environment with ready-made tools provided at https://openapi.tools/ (see the section “Testing). Read more about OpenAPI, including the specification, at https://www.openapis.org/. Build the authentication endpoint See the API specification at https://apidoc.prenly.com/remote-api/ for the authentication endpoint(s). You can choose the endpoint URL exactly as you wish; however, the endpoint must follow the API specification. Request parameters Request parameters are part of the request body as JSON and are sent by Prenly for each request. Response on success A successful login must respond with HTTP status code 200 and a JSON response with the unique identifier of the user that was authenticated. Response on failure Known errors that depend on the given request parameters must respond with one of the HTTP status codes 401, 403 or 412 as specified in the API documentation. These errors must include a JSON response following the Error data model, which you can find specified at the bottom of https://apidoc.prenly.com/remote-api/. You can choose to either provide an Error or an empty JSON object. Currently, only the "message" property is required if providing an Error. It is, however, recommended to also provide a "code" property. We highly recommend that you provide a “message” property value in English that represents the error in some way. If your software has some kind of internal codes, it is suitable to use them here if future mutual troubleshooting will be needed. Do not include personal data that is not needed, such as personal names! Unique IDs are good enough to troubleshoot. This information is never shown to the end user but can be logged in Prenly to simplify troubleshooting. Build the authorization endpoint See the API specification at https://apidoc.prenly.com/remote-api/ for the authorization endpoint(s). You can choose the endpoint URL exactly as you wish; however, the endpoint must follow the API specification. Request parameters Request parameters are part of the request body as JSON and are sent by Prenly for each request. Response on success A successful fetch of the user information must respond with HTTP status code 200 and a JSON response according to the UserSummary data model as described in the specification. Fields in this data object are explained at the bottom of https://apidoc.prenly.com/remote-api/. What properties are used to The only property that currently cannot be left blank is “uid”. The other properties can be omitted; however, we recommend that you specify a “productCodes” property to better control if Prenly should or should not grant read permission to publications. Currently, Prenly will treat a missing “productCodes” property as an empty list. Response on failure Known errors that depend on the given request parameters must respond with one of the HTTP status codes 403, 404 or 412 as specified in the API documentation. These errors must include a JSON response following the Error data model as described above. Testing It is important to test your implementation for the authentication and authorization endpoints. Refer to https://docs.google.com/document/d/1UxmvDs7_Z0GwGbwCHXr4Ojpb9HaZif1nJ8YRMmztzeo/ for more information regarding testing your endpoints. What happens in Prenly? When the user logs in (authentication + authorization) When the user requests to log in and submits the login form, the credentials are sent to Prenly’s authority (encrypted with SSL). From there, the authority handles how to use these credentials to authenticate the user. For the Remote authority API, this means that the credentials are sent to the remote endpoint according to the specification. Prenly will process the API response and handle both successful and failed authentication requests, where the user will see an error depending on the failure response HTTP status code. See below for more details. If authentication succeeded... A successful login will trigger a separate authorization request to the authorization remote API endpoint to fetch the user’s information, which is cached in Prenly for a limited set of time. The application will also reflect that someone is logged in, with the name or email based on what user data was returned within the user information. Note. If the immediate authorization request responds with HTTP 401 directly after the successful authentication request, Prenly will treat it as an implementation error, log out the user, and inform the user that their login credentials were wrong. To prevent this, it is recommended to use the token concept found within the UserIdentification schema in case you want to support logging out the user remotely. If credentials were wrong… If the request was technically successful, but the credentials were wrong, the Prenly authority will notify the application, and a message about wrong credentials will be presented to the user. If something failed... Other client- or server-based errors, or network errors, are caught and logged by Prenly. The application will be served with a suitable error message to present to the user. When the user keeps reading Caching for repeating requests Caching a successful authorization response data (the user’s information) eliminates the need for repeated requests to the remote API to fetch user data that seldom changes. Each Prenly customer can choose the cache expiration time; we recommend setting 30 minutes, where the minimum allowed cache expiration time is 20 minutes. Re-authorization Prenly will use the cached result for each authorization request as long as the cache has not expired. If the cache has expired, then Prenly will trigger a new authorization request to the authorization endpoint in the remote API. This will update the user’s data, such as product availability, as well as the cached data. Failure handling If a server error (5xx HTTP code) occurs when re-authorization is triggered, the cache expiration time is extended by five minutes. Prenly does this to avoid users being logged out for temporary network or server errors; the user will continue reading as if nothing happens, and after five minutes, a new re-authorization attempt is made. This behaviour lasts as long as the server problem persists. Prenly will log such technical problems and try to reach the customer if this happens. Going live When you think that the API is ready to go live (you are done developing and testing your implementation), contact us to take the last steps. Prenly will require information from you to set up your implementation in Prenly. The information will be evaluated, and if everything is up to par, your implementation can be used in Prenly for your chosen e-paper Prenly applications. Setting up Prenly Before your implementation of the remote API can be used in Prenly, you must provide: • Your chosen secret key for the authentication and authorization endpoints • Your chosen API endpoints • A list of products that should grant read permissions and for which Prenly title (only Prenly-known products within the product codes list from the authorization endpoint can grant read permission) • Your desired cache expiration time • A URL where a new user can create an account • A URL where a user can delete their account • A URL where a user can reset their password (in case they forgot their password) • We recommend that you also provide a URL where an authorized user without any Prenly-known product codes may activate a product (i.e. purchase a subscription) • User credentials (username and password) for the test user, where the user is shared by Textalk, Apple, and Google (if you have native apps), and at least one product code must remain active as long as the remote API is used by your e-paper’s Prenly authority
-
LOGIN | OAuth2
Created 24 Oct 2025
Prenly supports OAuth2 with or without OpenID Connect extension (OIDC) as long as the authorisation server follows the OAuth2 specification RFC 6749. You will likely need an authorisation server that supports OIDC. Prenly only supports the authorisation grant Authorization Code. The client Prenly will use in the OAuth2 flow is the e-paper's application authority (a technical implementation that decides how authentication and authorisation are handled by the e-paper application within Prenly's backend). Prenly will need to know a few things to be able to act as the client for the authorisation flow: • Optional*. The chosen issuer. This is mandatory if you want to use the OpenID Connect extension ID token claim. • Mandatory. The client ID you want the Prenly authority to use. • Mandatory. The client secret you want the Prenly authority to use when exchanging the provided authorisation grant for an access token when authenticating the Prenly authority (the client). • Optional. Scope. You may choose to make Prenly use a space-separated list of scopes defining the issued token's permission. The scope(s) will be used with the authorisation endpoint. • Optional. State. Prenly supports generating of state in the authorisation request. You may choose to either let Prenly generate a state or make the authority skip it. • Mandatory. Authorisation endpoint. The Prenly authority will navigate the user agent to this endpoint to initiate the authorisation flow with the authorisation server by logging in the user to obtain the authorisation code grant. • Mandatory. Token endpoint. The Prenly authority will try to exchange the user's authorisation code for an access token or, if your authorisation server supports it (which is strongly recommended), exchange the user's refresh token for a new access token. Authentication method. On default, Prenly uses the OIDC's client authentication method client_secret_basic when authenticating with the authorisation server's token endpoint. Prenly also has support for the client authentication method client_secret_post. Please notify Prenly if you require the latter, otherwise the default authentication method will be used. • Recommended. An external URL to log out the user. The Prenly authority will use the current user's selected user agent to log out the user remotely at the authorisation server. Prenly is capable of using placeholders in the URL when creating the authorisation request to log out the user by providing the following: ◦ The Client ID; ◦ The logout return URI; ◦ The logout error URI; Please note that state cannot be used. An example of a return URI query parameter is "post_logout_redirect_uri". Currently, only the HTTP method GET is supported for the logout URL. User ID The Prenly authority will need to know how to extract the unique user ID after the user has been successfully authorised by the authorisation server. This unique user ID, if you are using the Prenly Remote authority API, is the `uid` request parameter when requesting the user summary information. You may choose one of the following methods: • From a property in the JSON token endpoint response. If you choose this you must inform us of your chosen property name containing the user ID. • From the OpenID Connect "sub" claim in the signed ID token (as returned by the "id_token" token response property. To be able to extract the user ID you must also provide: ◦ Required. The external URL to public keys to validate the ID tokens. This URL must contain a JSON Web Key Set according to JWT standards (see RFC 7515), which can be referred to as either JKU or JWKS. ◦ Optional. The property name in the user data response that contains a customer number. ◦ Required. Prenly needs to know the issuer which must match the "iss" claim in the ID token when verifying the ID token. For more details see ID token. • From the "sub" property response from a UserInfo endpoint. To use this method you must also provide: ◦ Required. The UserInfo endpoint URL. The endpoint is used to fetch basic information about the user by using the user's access token to authorise the request. ◦ Optional. The property name in the user data response that contains a customer number. Resource server You may choose a resource server that Prenly supports or you are free to contact us at hello@prenly.com to make a request to Prenly to support your specific resource server as an integration task, which Prenly might support based on a paid development task. Out of the box, Prenly supports Prenly Remote authority API from version 1.4 or higher as a resource server. See our general information about Prenly Remote authority API for the concept of this API. To implement Prenly Remote authority API as a resource server please see the API specification for the endpoint /oauth2/getUser. The "resource" Prenly is requesting from the resource server is a list of subscription products associated with the user. The products, in the form of a product code, indicate the user's subscription status where each code is configured to grant read access to publications within your e-paper application. To grant the correct read access depending on the subscription product you must also inform Prenly which publications the product code authorises read access to. Any unknown product will be ignored. You might not need a dedicated resource server... Prenly can bypass a traditional resource server altogether if your UserInfo endpoint is capable of exposing the subscription status of the resource owner – the user. If your UserInfo endpoint is capable, all you will have to provide is the claim (property name) in the UserInfo endpoint response JSON data. The claim value must be a JSON list (array) of strings. Each list item represents a subscription product code. Provide information When you have all the required information please contact Prenly's customer service at hello@prenly.com with the information. The team will then set up the chosen e-paper application's Prenly authority to use OAuth2 for you.