


Configuring extensions
-
Set up IP Access for Location-Based Reading
27 Jul 2026
An IP-based subscription allows readers to access your content without logging in, as long as they are connected to a predefined IP address or IP range. Instead of verifying a user account, Prenly checks the reader’s network location and automatically grants access. What is it used for? IP-based subscriptions are useful when multiple people should be able to access your content from the same location without creating individual user accounts. Common use cases include: Libraries Schools and universities Offices and newsrooms Hotels and other public spaces Because access is based on the network rather than individual accounts, there is no limit to the number of readers who can access the content at the same time from an approved IP address. How is it implemented? To activate an IP-based subscription, simply send us the IP address or IP range that should be granted access. Once we receive the information, we will: Configure the IP address in Prenly. Connect the appropriate subscription package(s). Activate access for the specified network. After the setup is complete, readers connected to the approved network can access the included content without signing in. Be aware: Access is only available while the reader is connected to an approved network. If they leave the network, access is removed until they reconnect. There is no limit to the number of simultaneous users connected from an approved IP address or IP range. If you would like to activate IP-based subscriptions, have questions about the setup, or would like pricing information, please contact hello@prenly.com.
-
Enhanced Text-to-Speech in Prenly | ElevenLabs & AI Voices
27 Jul 2026
Enhanced Text-to-Speech converts your written articles into natural, human-like audio using voices from third-party text-to-speech providers. Once activated, audio is automatically generated for new publications, allowing readers to listen to articles instead of reading them. This makes your content more accessible and offers an additional way for readers to enjoy it.What is it used for? Enhanced Text-to-Speech uses voices from supported text-to-speech providers instead of the standard voices built into browsers and mobile devices. These voices sound more natural, with improved pronunciation, rhythm, and intonation, creating a better listening experience. You might choose Enhanced Text-to-Speech if you want to: Make your content more accessible. Give readers the option to listen to articles instead of reading them. Improve audio quality, particularly for languages where standard device voices are limited How is it implemented? To activate Enhanced Text-to-Speech, you first need an account with one of our supported text-to-speech providers. Once you have created your account and obtained the required credentials, send them to hello@prenly.com and we will configure the integration for your publication. You can compare available voices and find setup instructions for the supported providers on their respective websites. Prenly currently supports: Microsoft Azure Voice Gallery Google Cloud Text-to-Speech Amazon Polly Voices ElevenLabs Narakeet The exact credentials depend on the provider you choose. In general, you will need to provide: Voice (for example, en-US-JennyNeural) Speech key, API key, or JSON key file (depending on the provider) Region Language Voice gender After the integration has been configured, continue uploading your publications to Webarch as usual. Audio is then generated, imported, and made available automatically. Be aware: Only publications uploaded after the integration has been activated will include enhanced audio. Existing publications are not processed automatically. Technical details The quality of generated audio depends on the selected text-to-speech provider and voice. Some providers calculate character usage based not only on the article text but also on additional markup used for language and voice settings. This may affect the number of billable characters. If you would like to activate Enhanced Text-to-Speech for your publication, have questions about the setup, or would like pricing information, please contact hello@prenly.com.
-
Multi-Channel Publishing
23 Jul 2026
With Multi-Channel Publishing (MCP), a single publication can be prepared for delivery to multiple external systems.Once configured, the exports are generated automatically as part of the publication workflow, so no manual export process is required for each issue. What is it used for? Multi-Channel Publishing is used when your publication needs to be delivered to one or more external systems in a specific file format. Common examples include deliveries to libraries or archive systems. Instead of creating these exports manually for every publication, the required files are generated automatically according to the configured setup. How is it implemented? To configure the export, we need the following information: Which output format(s) should be generated (for example, EPUB)? What is the preferred file naming convention (for example, title_yyyymmdd)? Where should the generated files be delivered? Once this information has been provided, we configure the export workflow for you. Read more More information can be found on the webpage. If you are interested in using this feature or have questions regarding it, please contact hello@prenly.com.
-
Expand Your Digital Archive
8 Jun 2026
A certain amount of archive content is usually uploaded during the onboarding process, but more can be added at any time. A larger archive gives readers access to more historical content and makes it easier to find articles about specific topics, people, places, or events. Readers can search across both recent and older publications to revisit past articles or explore how a topic has been covered over time. Attract new readers with more content The archive can also help potential subscribers discover your content. Even non-subscribers can search the archive and see how much content is available on a topic they are interested in. It is also possible to make selected archive publications publicly available, giving readers a taste of your content before subscribing. How to highlight historical content Older issues can be highlighted in different ways. For example, you can automatically display a publication from 5, 10, or 20 years ago with the flashback component, or feature a special anniversary issue using the Editor’s Pick component. A larger archive also helps preserve your publication’s history and makes it easier for readers to explore past coverage of important events and stories. Learn more about the different components → How to Activate It If you are interested in adding more archive content, please contact us at hello@prenly.com. We’ll discuss: The amount of archive content you would like to add Pricing and import options The expected timeline How the archive material should be delivered How to Send Archive Material Archive material should be uploaded to us using an FTP client. The archive should consist of standard PDF files. To ensure a successful import, all files must follow a consistent naming structure. Read more about the correct naming structure here →
-
Third-party CMP modules
30 Mar 2026
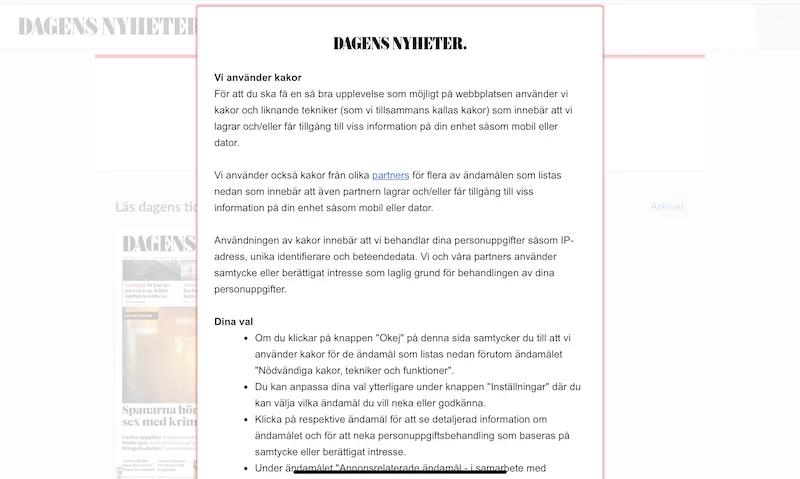
Prenly CMP can be used as a consent module in the e-paper at no extra cost. It meets the legal requirements but is limited in functionality and form.If you want to use a more advanced CMP module, we currently (2024) offer integrations with four third-party tools: Didomi, Cookiebot, Usercentrics and Sourcepoint.With any of these, you have greater possibilities to customize the shape and color and also integrate with other services so that the consent applies across multiple subdomains.The visitor is presented with the CMP dialog when they first visit the e-journal. The visitor can then choose to "Accept all" or make their own personal settings regarding consent for different purposes. The visitor's choice is saved, but the visitor can change their choice on a subsequent visit by re-opening the CMP dialog. If you want to use a third-party CMP, you will need to enter into an agreement with the CMP company yourself and make sure to set up consent dialogs and the features that need to be displayed and managed. An SDK (software development kit) needs to be built into the native apps and configuration needs to be done in Workspace to link the external CMP dialog with the app's functions so that the user's choices are both saved and respected. Contact our support to enable external CMP modules for your application in Prenly Workspace.There will be an additional ongoing cost for the integration we do with the third-party tool. Do you want to use any other CMP module than the ones we support today? Contact our sales team to get a cost estimate. Below is a review of the different tools that Prenly supports: Didomi https://www.didomi.io/Used on Bonnier News e-newspapers, for example Dagens Nyheter, works both on web, ios and Android.To use Didomi in the ios and Android apps, Didomi SDK needs to be built into the apps, which requires an app update.You need to create consent dialogs (consent notices) for web and native apps in Didomi admin and download api key and notice ID.Next, modules need to be created in Prenly Workspace where a number of values must be entered: - API key (Didomi's organization id for your account)- Notice id (if app id or domain is not specified in Didomi's admin)- Purpose ids for functional, analytical and marketing.- Vendor ids to control Prenly's functions.These values you need to get in Didomi's admin. Cookiebot https://www.cookiebot.com/ - has been bought by Usercentrics.Used in the web reader, currently on JP/Politikens e-newspapers, e.g. Politiken e-avis. A module needs to be created in Workspace and connected to the e-newspaper web client, where you enter the "Domain group ID" as defined in Cookiebot.Cookiebot scans the web reader's cookies and you must map each cookie to the correct purpose in Cookiebot's admin. Usercentrics https://usercentrics.com/ Currently used in apps for IOS and Android in JP/Politikens e-newspaper apps, for example Jyllands-Posten e-avis.To use Usercentrics, an SDK needs to be built into the IOS and Android apps, which requires an app update.Once the SDK is in place, the configuration can be completed in Prenly Workspace. There, a new consent module needs to be created and values entered for "settings-id" and also the mapping needs to be done between "service-id" in Usercentrics and features in Prenly. Sourcepoint sourcepoint.comCurrently used by Schibsted, for example in Aftonbladet and Svenska Dagbladet's e-newspapers, both web, ios and Android.To use Sourcepoint, you need to contact Prenly support, as a special SDK needs to be built into the app and a number of configurations need to be made in Prenly Workspace.
-

Free days access
18 Feb 2026
What is it? The Free Days access allows you to give interested readers free access to the content of your app for a limited number of days. This is ideal for potential subscribers who want to try your app before subscribing. You decide how many days the free trial period will last. When a user opens the app, their device is automatically registered. The registration starts the timer for the free trial. The user will then have access to the selected content for the number of days you have set. How to set it up? To enable free trial days authorization, please contact us, so we can activate the function for you. Please include the following: 1. number of free trial days: specify the number of days the free trial will be valid. 2. Package slug: If you create the package yourself in PWS, do it as described below and enter the slug of the package to be accessed. How to set up a package in PWS? This step can be skipped if the package and service are already set up. You need to create a service and a package to support the publishing tags. In Workspace, go to Settings -> Package Management. Click on "Services" -> "New". Add a name for the service and select the title(s) you want to give access to. Then create a new package and link it to the service you just created. Click on "Services" -> "New" Add a name to the service, give it a slug and select the service you just created. Send us the selected slug by email. If you need help configuring this, we will be happy to help you. Good to know Currently, only one package can be connected to the authorizer. The free days authorizer only works in the native apps (iOS and Android). The free trial period starts when the app is opened and the device is registered.
-

Tags and Permissions
24 Oct 2025
One option when allowing access to your content, is to grant access to the entire title. Or you can set up for flexible subscription packages with the tag-based permission system. That means that you now can offer various subscription models with flexible access, like:• Access only to Sunday’s publications• Access only to Monday-Friday publications• Access only to the last 7 days, not the full archive This flexibility gives you opportunities to offer a range of subscription packages with various price tags within the same title. This filtering is accomplished by adding tags to each publication and creating corresponding subscription services. It can easily be done either manually in Prenly Workspace or by sending data to our Connect api. Let’s say you add the tag “Sunday” to all of your Sunday publications. That will enable you to create a subscription package which gives your subscribers access to the publications tagged “Sunday” but nothing more. How to add tags? You can add a tag manually to any publication by opening the settings for each publication in Prenly Workspace and add a tag there. Click the three dots in the bottom right corner of a publication to open a small menu where you select “Edit”. In the publication settings you can add tags. If a tag has already been created you can choose it from a list. You can also add tags automatically by using our api and send a batch of tag updates. You can do this for previously published publications, and you can set up a daily api call to add tags to any new publications. See the documentation of the api. https://apidoc.prenly.com/connect-api/ How to create packages? Navigate to “Package management” found in Prenly Workspace Settings. You have to create a Package and a Service to support the publication tags.In Workspace you go to Settings -> Package Management Click “Services” -> “New” Add a name to the service, select title and add the same tag that you have added to the publications. Then create a new Package and connect it to the Service you just created. The Package has a slug that you can add to subscribers in your subscription system. Summary If you give a subscriber access to a subscription called “sundays_only” in your subscription system. You should set up a subscription package in Prenly Workspace with a slug called “sundays_only”And you should set the access of that subscription package to access a title with publications tagged “Sunday”And finally add tag “Sunday” to all publications that should be accessed. Note The tag-based permissions will work out of the box with many integrations set up with the Prenly Remote API. For some integrations there have to be additional configurations done deeper into the Prenly access system. Please contact our helpdesk if you need assistance.
-
IP-based access
24 Oct 2025
With IP-based access, users can read the e-newspaper without needing to log in — as long as they are connected to a network with an approved IP address. This is a convenient solution for places like companies, schools, or hotels where multiple users need access from the same location. How it works: - A list of IP addresses is provided to Prenly Support.- The list is linked to one or more subscription packages in Prenly.- All users connected to the specified network get automatic access to the e-newspaper — no login required. IP-based access is an add-on service, and the cost depends on how many IP addresses are included. ? Want to know more or get started with IP-based access? Contact Prenly support, hello@prenly.com